Spoiler alert!
If you have not yet, launch the paper-rock-scissors video interview first, before you continue reading how it was made.

I’ll give you the design process as well as the major points of development. You may decide which part you’re interested in but I’d suggest going through the design first, and then the development. Coincidentally, the steps are in this exact order:
Step 1: The Idea
First, let me tell you about the design part, about how the idea was born. The instructions for the challenge were clear that there’s going to be questions and video answers, interview style in the Storyline module.
#1 First thing I usually do is steal. By that I mean re-purpose. I searched for a template that I could use and found this one:
https://community.articulate.com/download/storyline-2-video-gallery-interaction

This is already a neat template for a video gallery. I immediately saw that this could be the base for the module. I’m going to need six questions and six video interview answers to match.
Step 2: Game Plan
The template itself is neat for a gallery but it doesn’t support game-thinking. After some brainstorming, I landed on rock-paper-scissors approach. In game design, you often see the same pattern. The reason why the formula works is that nothing is superior to all of the elements. No matter which one you chose (rock, paper, scissors), there’s a chance that you lose.
Now that I had the game element to infuse, I sketched down the flow. Each question needs to be locked. You can only see the answer for each question after you beat the system. So far, so good. When you gamify static content, it is good to consider about motivation. What will motivate people to actually try to play this silly game just to see a video clip?
The answer depends on what type of “player” we’re talking about. While this is not a full-blown gamification or game-based learning, I still wanted to add something to cover some of the basic user types:

Looking at the basics user types, I concluded that the locked states of each question can serve two purposes: challenge for the Achievers and Players. b) progress for all. I decided to add a visual lock on the questions as a teaser “just to get one more question unlocked”.
Free Spirits might not like that fact that they have to go through the questions in order. They don’t want to be restricted in their flow. So, I adjusted the design a little. Players still need to unlock the questions in order but they don’t need to watch the video clip in order. This provides a choice that Free Spirits appreciate. Make up your own strategy, kind of.
Socializers might love the actual clip. It’s like talking to a person. To make that more interesting for them, I had an idea to make this whole video interview a “strip” rock-paper-scissors game. Adding some fun elements, mystery to the process may provide motivation to players to get through all questions.
Finally, I added some rules around points that raises the stakes. Each time you win a round, your potential points to win the next time grows. However, if you lose one round, you break the streak. These simple variations makes the game-play fun and more interesting each time.
Then I realized there’s actually no point watching the video clips because your points are coming from playing the RPS game. To compensate that, I added one last rule: bonus to watch the whole clip. Now, there’s an incentive! Except, you can launch a video a hundred times and keep collecting points. Again, points should be meaningful. So, I restricted the bonus for one time only in the design.
There was one last thing left to decide. How does the system pick a weapon (rock-paper-scissors)? I could do it completely random. Or decide based on the opponent’s pick (kind of cheating). The point of this game is not to frustrate players but provide a challenge. Enter the “Artificial Intelligence” piece. I wanted to have a system that you can beat, as long as you figure out the strategy (so not completely random). The AI rule is as simple as this: first pick is random. After that, the system picks what your last choice was. Have you noticed?
After the design phase, it was time for action.
Step 3: Making the videos
I “dressed up” and recorded the answers just simply using my webcam. However, I wanted to make this a little more mysterious than a face in a room, so I got couple sheets of green paper and put it on the wall behind me. I intentionally left those in some of the shots for you to see :). Then I used Camtasia to remove the color green and added a video behind with weird fish animation from PresenterMedia. This is a like a cheap, home-made green screen action movie.
Step 4: Storyline development
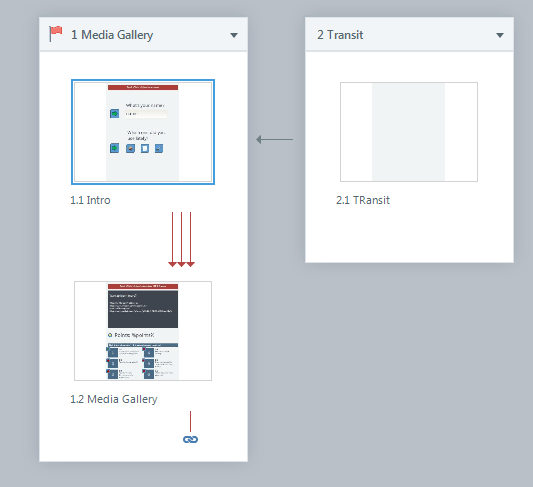
The Storyline structure is actually very simple. In the Media Gallery, I have to screens. The first one will serve as an entry point to collect the player’s name. The other screen is the actual gallery and game, all in one screen with layers. I’ll get to the Transit later.
Intro Screen
The Intro screen collects the name of the player (with a default as Guest), and prompts the player to choose one of the weapons. This latter action has two purposes. One, is to introduce the player to the visual representation of the game. By the time they will get to the first round of the game, they’ve already seen the icons (although, they are kind of obvious, I tried to minimize the cognitive overload by chunking and spacing the visual info). The second purpose of this is potentially, you could use that as the first system choice instead of a random one.

The “Brain”
Now, let’s talk about the “Brain” of the system. This is what the screen looks like in action.

I made some changes to the original template. I’m not using video clip description, so I removed that text and replaced that by points.
I created a variable for points. I also added a marker for more info on how to play and how to get more points.
Then replaced the original placeholder text with the actual questions for each round.
The lock icons represent the status of each question. There are actually three possible states for each question:
a) Locked -> Red Lock
This means you can’t click on it. Nothing happens. The previous question must be unlocked.
b) Unlocked -> Green Lock
If the question is unlocked, you can click on it. It will display the round of RPS game.
c) Completed – No lock.
Once you beat the system in that round, the lock disappears. After the lock is gone, you can click on the number to play the video clip.
Each video clip is on a different slide layer. The slide layers are very simple. They play the video clip and add points if it was played through all the way. But I wanted to point out something here.
Adding Bonus for Watching the Clip
As I mentioned, the system should add bonus points if the video is played all the way through BUT only for the very first time.

Here’s how I made it happen:

The points for the player is calculated based on a variable, called SuperStar.
Points = 10 * Superstar
That means with every win, the player gets 10 * SuperStar points added to their existing points. So, the bigger this SuperStar the the higher the points.
SuperStar is a variable that has two components: how many consecutive wins the players has and how many videos the player watched all the way through.
The Trigger on the left is fired when the video completes. At that point, we’re adding to the SuperStar as a bonus for watching the movie.
As you see, it doesn’t add a fixed number (like 10) each time but a variable, Q1. Why I did this is because I want to reward the player once for watching. So, initially, the Q1 variable is 10. However, right after this trigger, another trigger executes:

This one sets the Q1 to 0 when the video completes.
Let’s recap what’s going on. I always add to Q1 to the SuperStar after the video completes but Q1 is only 10 initially. After the first view it gets set to 0. Which means 0 will be added to SuperStar for any other views.
You could achieve the same using Conditions and checking if this is the first watch or not.
The only difference is that if later you decide that you want to tweak the point system, and let’s say give 10 to SuperStar for the first watch, and then 9 for the next, 8 for the next, etc… Then you could change the Q1 = 0 trigger to Q1 = Q1 -1.
The Game layer
This is the most complicated part of the module. There are several things going on here. First, I used the %Guest% variable to address the player and the %stake% variable to show how many points they may win with this round. Remember the calculations for points? Points = Points + 10 * SuperStar.
So, %stake% is calculated as 10 * Superstar. It’s good to show the player what’s at stake. Once they select a weapon, the rest are disabled and the battle starts.
I set the state for the Guest choice to the weapon they chose first. For simulating the system’s thinking, I used some JavaScript that randomly generates a number between 1-3 and sets the weapon periodically. That’s just for visual purposes. The system already knows what the actual choice is.

The JavaScript engine

What the script does is saves the system pick and display it (by a trigger in Storyline that is watching the variable change and adjust the state based on the variable).
Then the system checks who wins by comparing the player’s choice to the system choice. It generates a message and adjusts the points variable.
Finally, depending on the outcome of the battle, adjusts the SuperStar variable. If the player wins, it adds to the SuperStar, raising the stakes for the next round.
If it’s a draw or a loss, it sets the SuperStar variable to 1 again. And poor player has to build up the lucky streak from scratch..
The Transit screen
As for the Transit screen, I had some issues juggling variable changes and triggers picking up the change, so as a workaround, I added the transit screen. It serves as a fade in screen between the game and the gallery to make sure the gallery triggers picks up the variable change and the locks are displayed accordingly. If I had more time, I would investigate that but this works as well.
If you want play around with the source files I can strip my videos and the music, and create a generic version!
Attractive portion of content. I simply stumbled upon your blog and in accession capital to assert that I acquire in fact loved
account your weblog posts. Any way I’ll be subscribing in your feeds and even I fulfillment you get
admission to persistently quickly.
I got this web page from my buddy who shared with me on the topic of this web site
and at the moment this time I am visiting this web page and reading
very informative posts at this time.